
【Typescript】axiosのREADME読んでみた Part1【React】
この記事はReactでaxiosを使うために、axiosのREADMEを読んで得た情報をまとまたものです。React×Typescriptのサンプルコードも載せています。
こんにちは!nomurabbitです。今日はnode.jsのHTTPクライアントであるaxiosについて、READMEを読んで勉強していきます。
使い方を身につけて、自由自在にHTTP通信しちゃいましょう!
axios
まずはaxiosの概要です。READMEの冒頭にこのような記述があります。
Promise based HTTP client for the browser and node.js
Promise based HTTP clientとあるように、axiosのメソッドの戻り値はPromiseで返ってきます。そのためaxiosの非同期処理は、then、catchでチェーンをつなげて実行順序をコントロールできます。
後ほどExampleの項でも解説します。
Features
次に、axiosの特徴です。
英語 ver.
和訳 ver. by nomurabbit
各項目の具体的な内容は、このあと出てくるサンプルコードで試してみましょう。
Installing
Using npm:
$ npm install axios
Using bower:
$ bower install axios
Using yarn:
$ yarn add axios
Using jsDelivr CDN:
<script src="https://cdn.jsdelivr.net/npm/axios/dist/axios.min.js"></script>
Using unpkg CDN:
<script src="https://unpkg.com/axios/dist/axios.min.js"></script>
このブログで使っているyarnでも、ばっちりインストールできますね。
Example
CommonJS usage
In order to gain the TypeScript typings (for intellisense / autocomplete) while using CommonJS imports with require() use the following approach:
const axios = require('axios').default;

// axios.<method> will now provide autocomplete and parameter typings
CommonJSのプロジェクトにimportをする時の注意事項です。Reactにimportする時は、以下のようになります。
import nomurabbit ver.
import axios from 'axios';
続いてはメソッドごとの使い方紹介です。まずはaxios.get()から。公式ページではJSの書き方で紹介されています。前半の2つがthen()、catch()のメソッドチェーンを使った書き方で、最後の一つがasync/awaitを使った書き方です。
Performing a GET request
const axios = require('axios');

// Make a request for a user with a given ID
axios.get('/user?ID=12345')
  .then(function (response) {
    // handle success
    console.log(response);
  })
  .catch(function (error) {
    // handle error
    console.log(error);
  })
  .then(function () {
    // always executed
  });

// Optionally the request above could also be done as
axios.get('/user', {
    params: {
      ID: 12345
    }
  })
  .then(function (response) {
    console.log(response);
  })
  .catch(function (error) {
    console.log(error);
  })
  .then(function () {
    // always executed
  });

// Want to use async/await? Add the `async` keyword to your outer function/method.
async function getUser() {
  try {
    const response = await axios.get('/user?ID=12345');
    console.log(response);
  } catch (error) {
    console.error(error);
  }
}
これを踏まえたうえでReactのサンプルコードがこちらです。
Reactサンプルコード nomruabbir ver. その1
import React from 'react';
import axios from 'axios';
import ResponsiveDrawer from '../components/layout/ResponsiveDrawer';

const Home = () => {

  const apiUrl = "https://api_no_url";

  const getHttpResponse = () => {
    axios.get(apiUrl)
    .then((response) => {
      console.log(response);
    })
    .catch((error) => {
      console.log(error);
    });
  }

  return (
    <ResponsiveDrawer>
      <div>
        <p>home page.</p>
        <button onClick={() => getHttpResponse()}>
          Click me
        </button>
      </div>
    </ResponsiveDrawer>
  );
}

export default Home;
インポートは前述の通り、
import axios from 'axios';
と記載した上で、then()、catch()を使った書き方となっています。ここでaxios.get()がPromiseを返すので、then()およびcatch()ではそれぞれPromiseのresolve時、reject時のコールバック関数を指定できます。
もう少し中身を見てみると、resolve時にコールバック関数に渡されるのがAxiosResponse型の引数で、reject時にに渡されるのがany型の引数です。

なので、こんな感じでaxios.get()を成功させてやると、
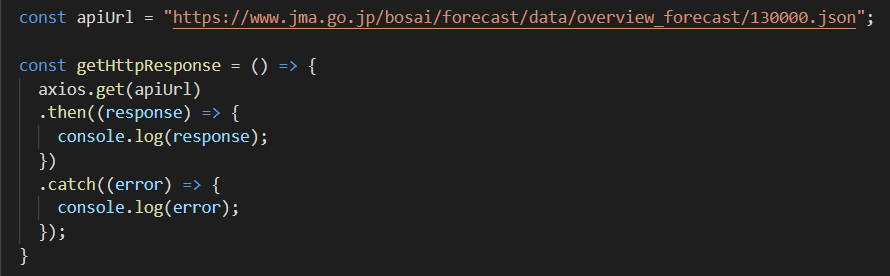
AxiosResponse型のインスタンスとして返ってきます。

要素にアクセスするときは何も気にせずに "." で潜っていけばOKです。

こんな感じ。

逆にaxios.get()を失敗させてやると、

こんな感じで返ってきます。

実際のReactアプリで使うとなったらHTTPリクエストは副作用なので、useEffectを使ったほうがベターだと思います。こんな感じ。
Reactサンプルコード nomruabbir ver. その2
import React, { useEffect, useState } from 'react';
import axios from 'axios';
import ResponsiveDrawer from '../components/layout/ResponsiveDrawer';

const Home = () => {

  const [httpRequestMessage, setHttpRequestMessage] = useState("");
  const apiUrl = "https://api_no_url";

  useEffect(() => {
    if(httpRequestMessage !== ""){
      axios.get(apiUrl + "?message=" + httpRequestMessage)
      .then(function (response) {
        console.log(response);
      })
      .catch(function (error) {
        console.log(error);
      });
    }
  },[httpRequestMessage]);

  return (
    <ResponsiveDrawer>
      <div>
        <p>home page.</p>
        <button onClick={() => setHttpRequestMessage("Hello")}>
          Click me
        </button>
      </div>
    </ResponsiveDrawer>
  );
}

export default Home;
Reactとaxiosについては、過去の記事でも取り扱っています。ぜひあわせてご覧ください。
というわけで、axiosのREADME読んでみた Part1いかがでしたでしょうか?次回以降、他のHTTPメソッドやHTTPヘッダーのカスタマイズにも触れていきたいと思います。
次回もぜひご覧ください。では!