
【Typescript】DeepLをReactに実装してみた【Lambda】
この記事はDeepLのAPIをReactアプリに実装する方法を解説したものです。
こんにちは!らびです。今回はDeepLをReactアプリに実装していきます。
DeepLのAPIを呼び出す方法は昨日の記事を参考にしてください。
Reactテンプレートを作成
まずはReactのテンプレートを作成します。コマンドは下記の内容を参考にしてください。
$ yarn create react-app my_react_app_20220116_deepl --template typescript
$ cd my_react_app_20220116_deepl
$ yarn add react-router-dom
$ yarn add @mui/material @emotion/react @emotion/styled @mui/icons-material @mui/icons-material
$ yarn add axios
$ npm install react-hook-form
Httpリクエストはaxios
APIの呼び出しはaxiosで実装します。今回はDeepLのAPIを直接呼び出すのではなく、自作のAWS Lmabdaを経由してDeepLへアクセスします。
自作のLambdaを経由することで、ログの取得や認可のコントロールがしやすくなるジョ。
const [httpResponseText, setHttpResponseText] = useState<string>("");

interface IdeeplHttpResponseMessage {
  text: string
}

axios.post("https://aws-lambda-he-access-surutame-no-url", data,{
  headers: {
    'Content-Type': 'text/plain',
    'Accept': '*/*',
    'Authorization': 'DeepL-Auth-Key deepl-no-auth-key'
  },
}).then((response) => {
  const responseData: IdeeplHttpResponseMessage = response.data;
  setHttpResponseText(responseData.text);
}).catch((thrown) => {
  console.log(thrown);
});
URLとDeepLの認証キーはみなさんの環境に合わせて変更してください。
実装
UIはシンプルに、翻訳後の言語、翻訳対象の文字列、サブミットボタンの3段構成になっています。
return (
  <ResponsiveDrawer>
    <div>
      <form onSubmit={handleSubmit(onSubmit)}>
        <List>
          <ListItem>
            <input defaultValue="JA" {...register("target_lang", { required: false })} />
            {formState.errors.target_lang && <span>This field is required</span>}
          </ListItem><ListItem>
            <textarea defaultValue="test" {...register("text", { required: true })} />
            {formState.errors.text && <span>This field is required</span>}
          </ListItem><ListItem>
            {httpResponseText}
          </ListItem><ListItem>
            <input type="submit" />
          </ListItem>
        </List>
      </form>
    </div>
  </ResponsiveDrawer>
);
react hook formのエラー処理も加えてみたジョ。
実行結果
それでは実行してみましょう。翻訳後の言語と翻訳対象の文字列をそれぞれ入力フォームに書き込んで送信ボタンを押すと…。
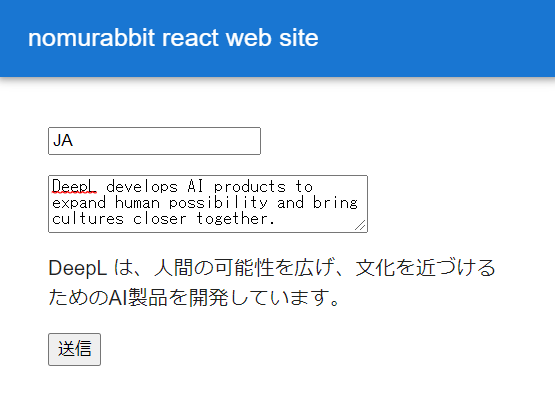
翻訳された文字列が返ってきましたね!
ちなみに文章はDeepLの公式Twitterのヘッダーから拝借したジョ。
まとめ
というわけで、今回はDeepLをReactに実装してみましたが、いかがでしたでしょうか?
フロントエンドの実装があるとアプリ作った感がすごく沸いてきます!
次回もぜひご覧ください。では!