
【AWS】ReactアプリにAmplifyでCognito認証追加してみた【Amplify】
この記事は
AWS Amplify Advent Calendar 2021
の8日目です。
7日目は@Kaiki-kkさんのこちらの記事でした。
qiita.com
Amplify CLIでLambda作れちゃうんですね。
今度試してみます!
改めましてこんにちは!nomurabbitです。
この記事では、ReactアプリにAmplifyで
Cognito認証を追加する方法を紹介します。
これで権限を意識した
アプリの構成を実現できますね。
Reactアプリの構成
今回のアプリの構成はこんな感じです。
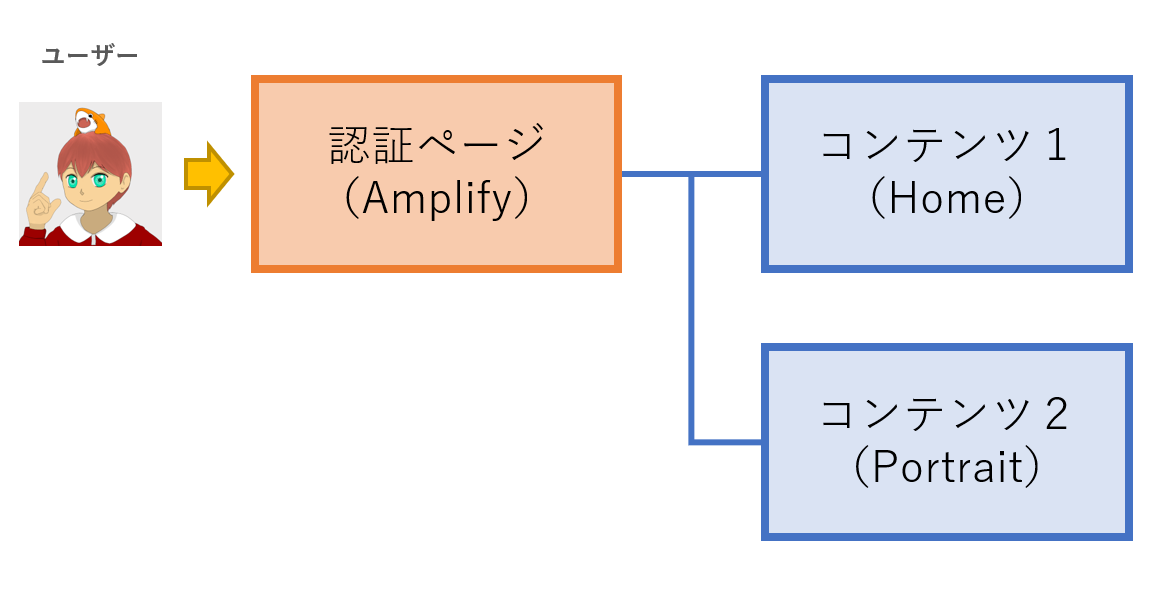
2画面構成のシンプルなアプリに
Amplifyで認証画面を追加しています。
認証情報は既存のCognitoで管理します。
Amplifyの準備
まずはReactアプリのテンプレートに
Amplifyの設定を追加します。
yarn create react-app my_react_app_20211208_amplify --template typescript
cd my_react_app_20211208_amplify
amplify init
amplify import auth
amplify push
今回は既存のCognitoを使うので、
amplify import authを使っています。
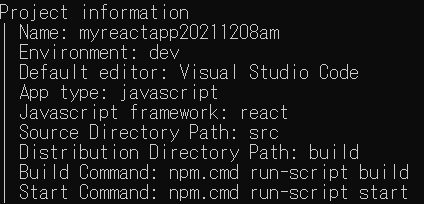
ちなみにamplify initの設定はこんな感じです。
最後に必要なパッケージを追加して準備完了です。
yarn add aws-amplify @aws-amplify/ui-react@1.x.x
ページの作成
次にアプリのページを作っていきます。
今回はルーティングとデザインに
react-router-domとmuiを使いたいので、
それぞれパッケージを追加します。
yarn add react-router-dom
yarn add @mui/material @emotion/react @emotion/styled
yarn add @mui/icons-material
参考までに、ルーティングを記述した
App.tsxはこんな感じです。
import React from 'react';
import {BrowserRouter, Routes, Route} from "react-router-dom";
import { withAuthenticator } from '@aws-amplify/ui-react'
import Home from './pages/Home';
import Portrait from './pages/Portrait';
import './App.css';

function App() {
  return (
    <BrowserRouter>
      <Routes>
        <Route path="/web/portrait" element={<Portrait/>} />
        <Route path="/web/home" element={<Home/>} />
        <Route path="/web/" element={<Home/>} />
        <Route path="*" element={<Home/>} />
      </Routes>
    </BrowserRouter>
  );
}

export default withAuthenticator(App);
react-router-domはバージョンによって
少し書き方が異なるので注意ですね。
ちなみに今回は6.0.2を使っています。
GitHubにソースコードを載せていますので、
よければご覧ください。
ReactアプリをS3に配置して
API GatewayやCloud Front経由で公開する場合は
こちらの記事も参考にしてみてください。
MUI ver 5.2.2を利用するときの
ポイントはこちら
nomurabbit.hatenablog.jp
サーバーレスで公開するときの
ポイントはこちら
nomurabbit.hatenablog.jp
画像を公開するときの
ポイントはこちら
nomurabbit.hatenablog.jp
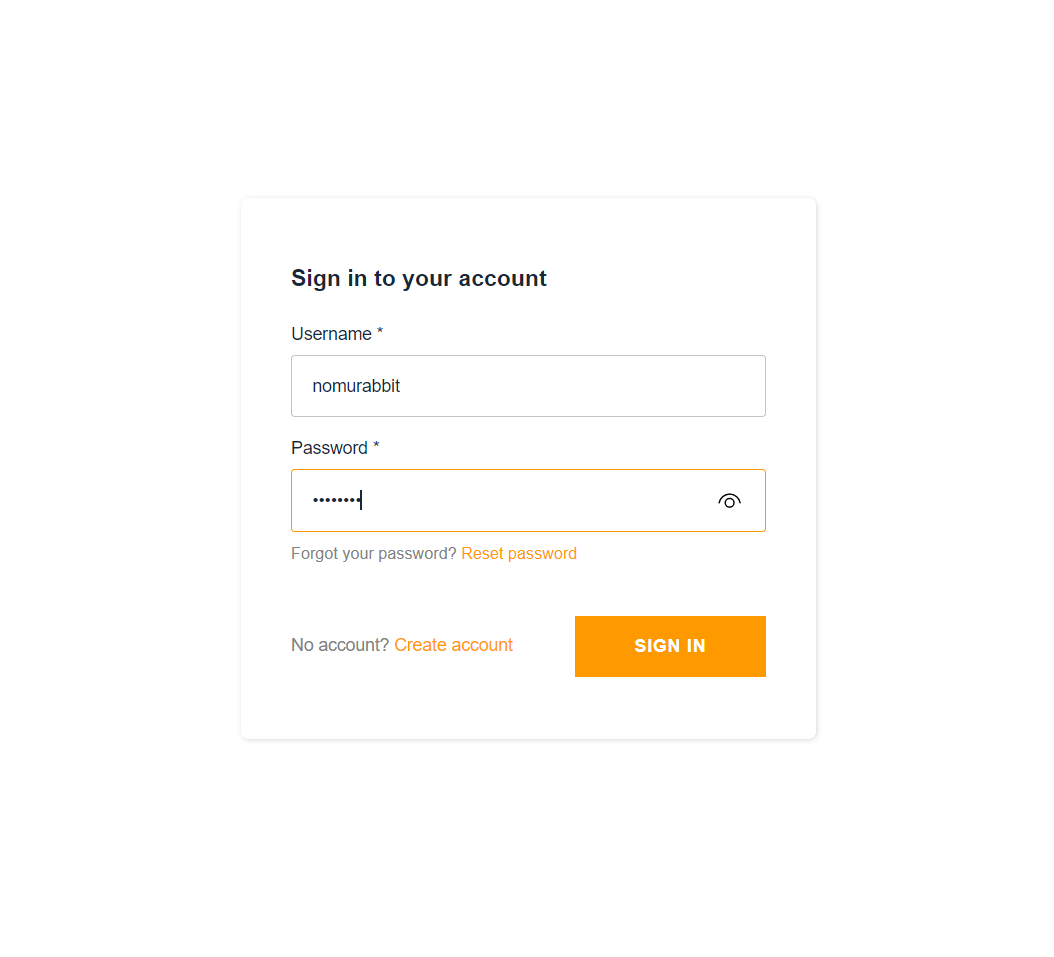
完成
完成したサイトがこちらです。
ジャジャーン!
認証ページ
コンテンツ1(Home)
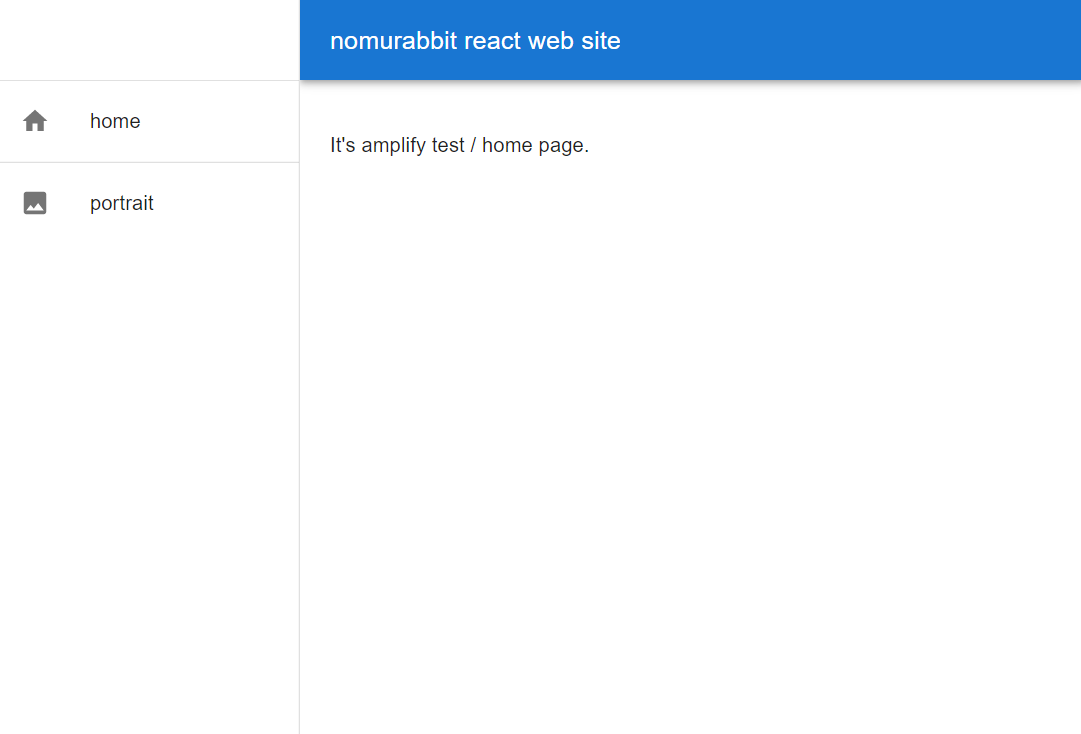
コンテンツ2(Portrait)

以上でReactアプリに
AmplifyでCognito認証を
追加することができました。
よかったら試してみてください。
9日目は@lambdasourさんの記事です。
よろしくお願いします!